Scheduling
This guide covers how to set up your availability, create bookable events, and manage client sessions.
Setting Up Your Availability
Your availability defines when clients can book sessions with you. To configure your weekly schedule:
- Go to My Profile > Schedule
- For each day of the week, click Add Time Slot to add available hours
- Set the start and end times for each block (e.g., 9:00 AM - 12:00 PM)
- Add multiple time slots per day if you have breaks (e.g., morning and afternoon blocks)
- Click Save Schedule when finished
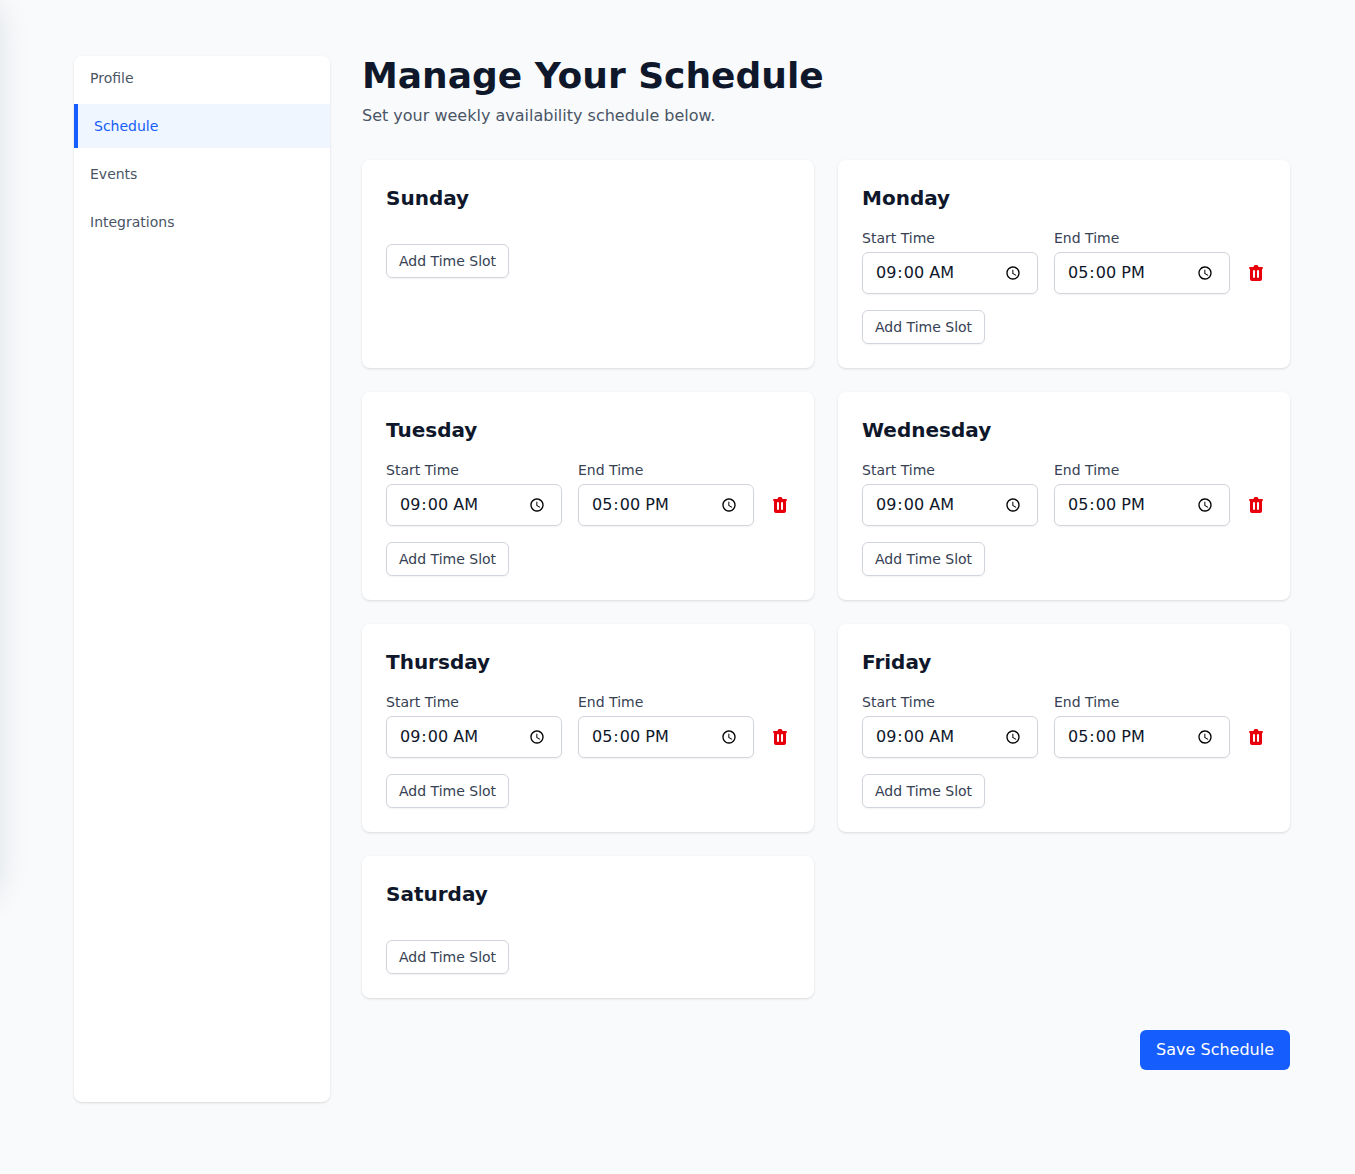
Tips:
- You can have up to 15 time slots per day
- Leave days blank if you’re not available
- Changes take effect immediately for new bookings
Creating Bookable Events
Events are the session types that clients can book (e.g., “Initial Consultation”, “50-Minute Session”). To set up your events:
- Go to My Profile > Events
- For each event type, enter:
- Title - What clients will see (e.g., “Therapy Session”)
- Description - Details about the session
- Duration - Length in minutes
- Click Save when finished
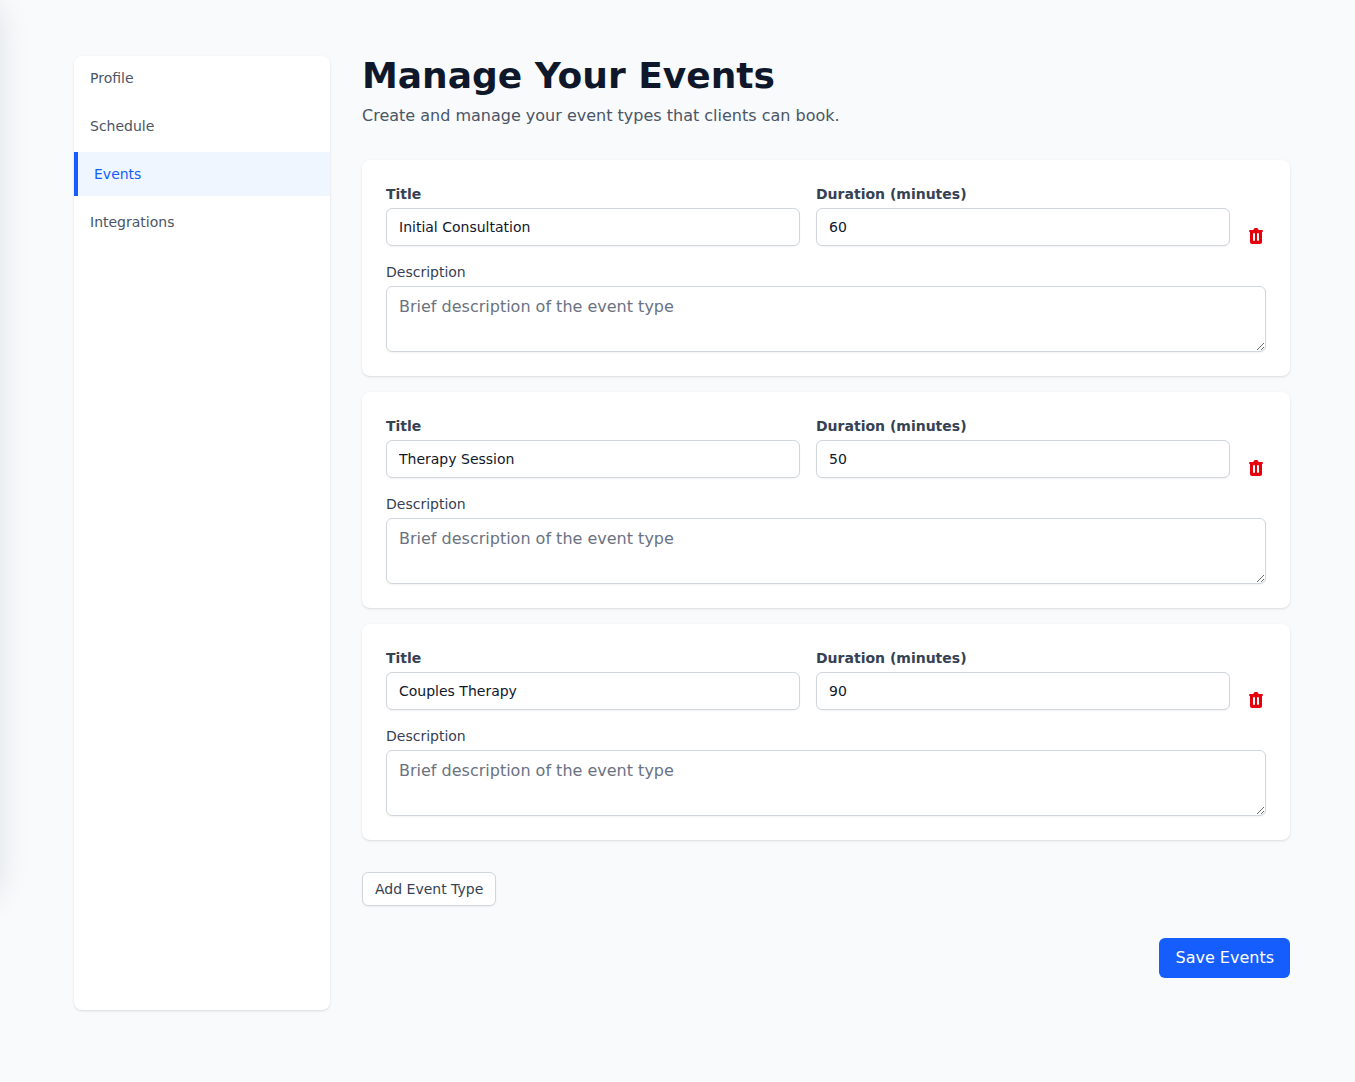
You can create up to 15 different event types.
Your Booking Page
Each therapist has a public booking page at:
https://app.hipaatherapy.com/book/your-usernameWhen clients visit this page, they can:
- Select their timezone
- Choose an event type
- View a calendar showing your available slots
- Pick a time and confirm their booking

Share this link on your website, email signature, or social media to let clients self-schedule.
New Bookings and Client Intake
When someone books through your booking page, they don’t go straight into your active client list. They show up as an intake client in a dedicated “New bookings” section at the top of your Clients page. This gives you a chance to review each booking before deciding what to do with it.
For each intake client, you have three options:
- Accept - Converts them into an active client. They’ll move into your regular client list and you can start scheduling sessions, writing notes, and managing their record.
- Reject - Removes the client and their booked sessions entirely. Use this for bookings you don’t want to take on.
- Merge - Folds the booking into an existing client’s record. This is useful when a returning client books through your public page and creates a duplicate. Select the existing client, and their booked sessions transfer over.
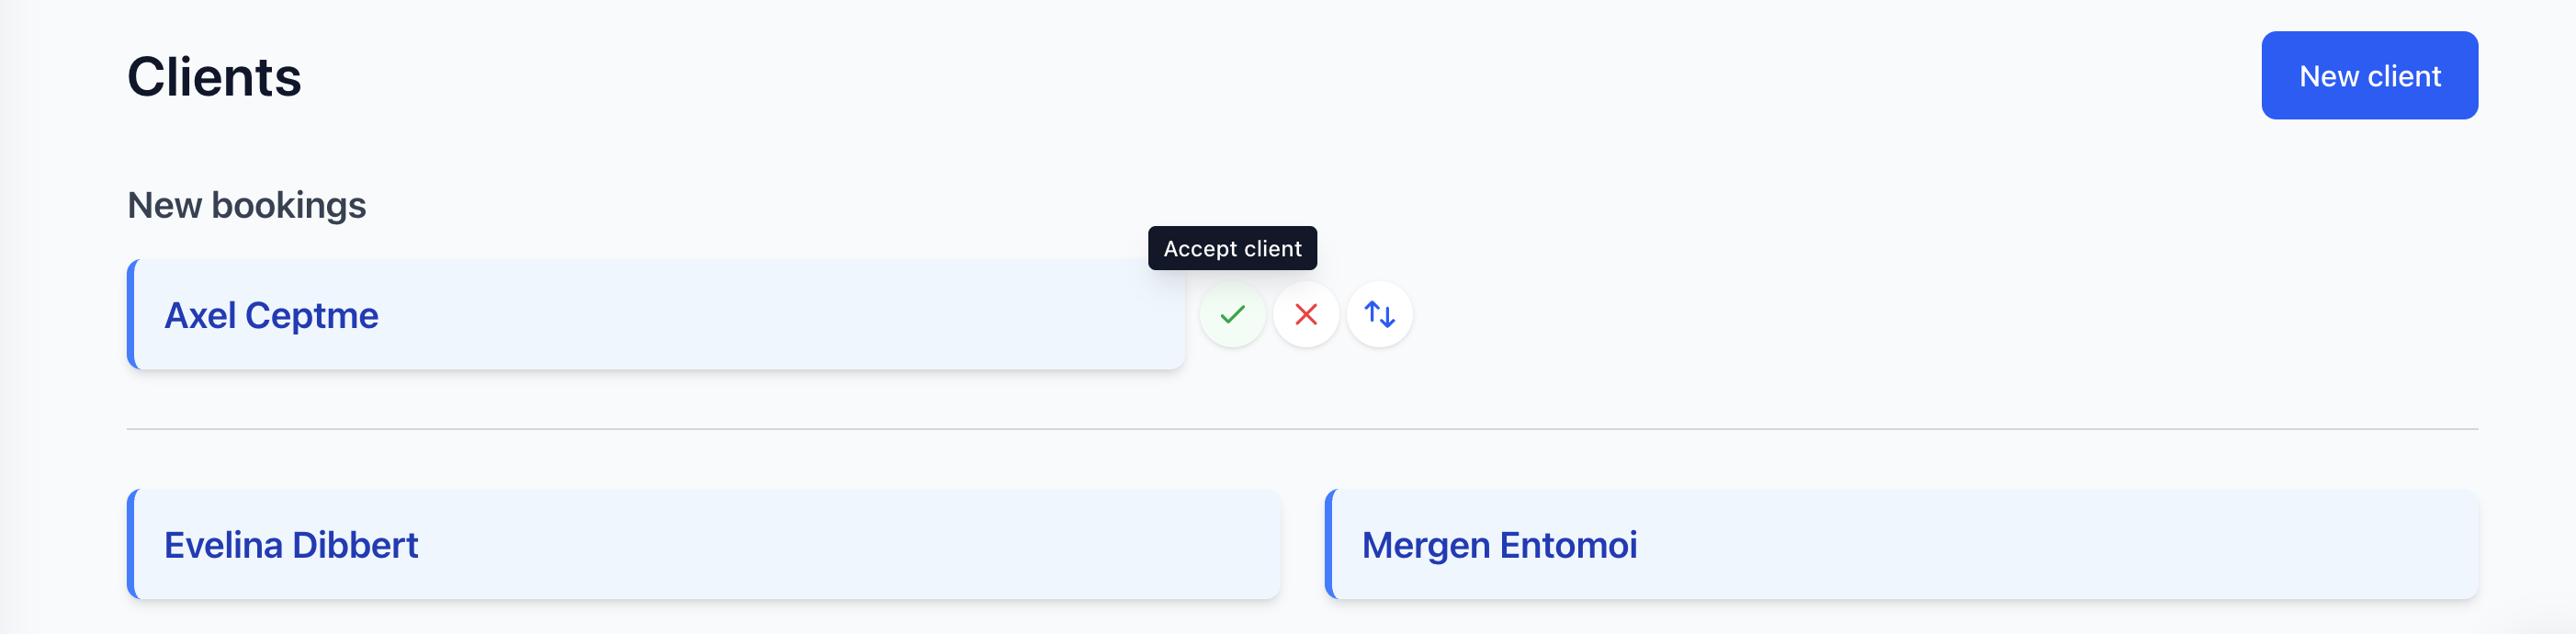
Once you accept or merge a client, they work just like any other client in the system.
Managing Sessions
Viewing Your Calendar
Go to My Profile > Sessions to see your scheduled appointments in a monthly calendar view. Click any session to view details including:
- Client name
- Session type and duration
- Start time
- Meeting link
- Payment status
Creating Sessions Manually
To schedule a session for a client:
- Go to the client’s profile
- Click New Session
- Select the session type, date, and time
- Save the session
Cancelling Sessions
To cancel a session:
- Open the session details
- Click Cancel Session
- Optionally add a reason
- Choose whether to notify the client by email
Client cancellations:
- Clients can cancel sessions from their portal
- They must cancel at least 24 hours in advance
- You’ll receive an email notification when a client cancels
Time Off
Block off dates when you’re unavailable for bookings — vacations, sick days, personal appointments, or anything else. Blocked time automatically removes those slots from your booking page so clients can’t schedule during that period.
Adding Time Off
- Go to My Profile > Time Off
- Click Add Time Off
- Select your start and end dates
- Toggle All day off if you only need to block part of a day, then set start and end times
- Optionally add a reason for your own reference
- Click Save Time Off
Time off applies on top of your regular availability. If you have availability set for Monday 9–5 but add a time off for that Monday, no slots will appear on your booking page for that day.

Removing Time Off
To remove a time off entry, go to My Profile > Time Off and click the delete icon next to the entry. The blocked slots will immediately become bookable again.
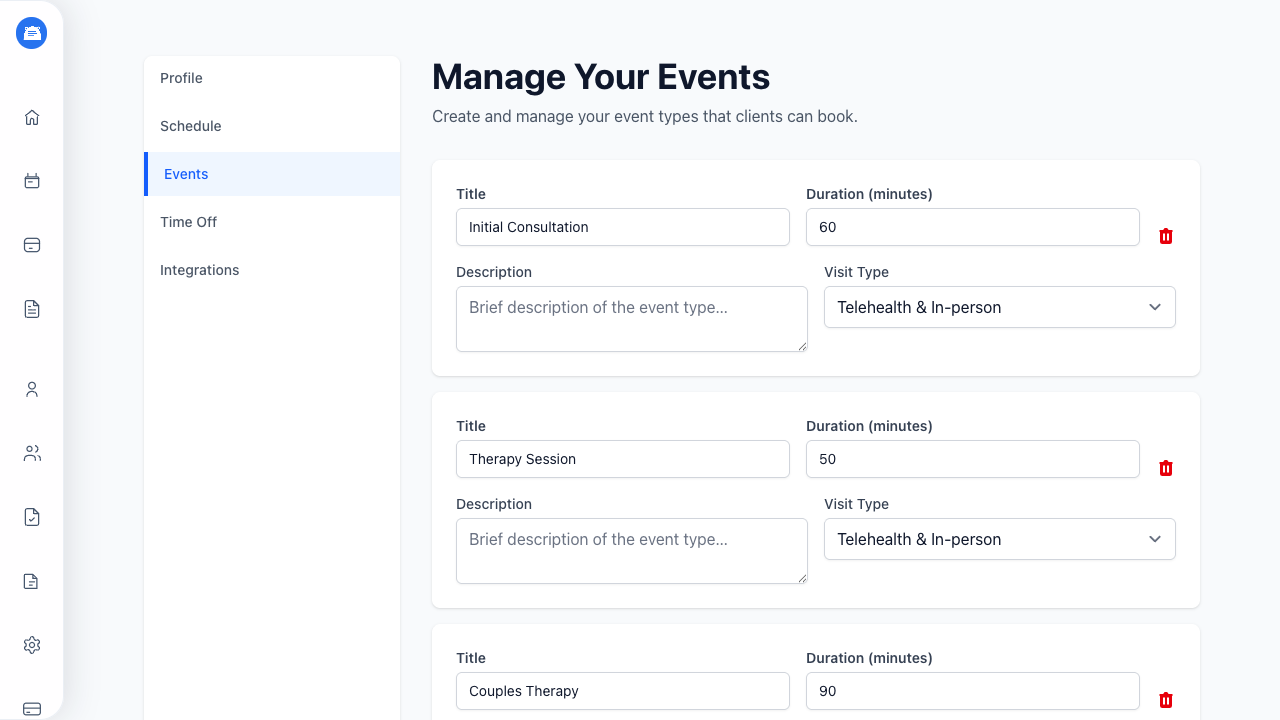
Visit Types
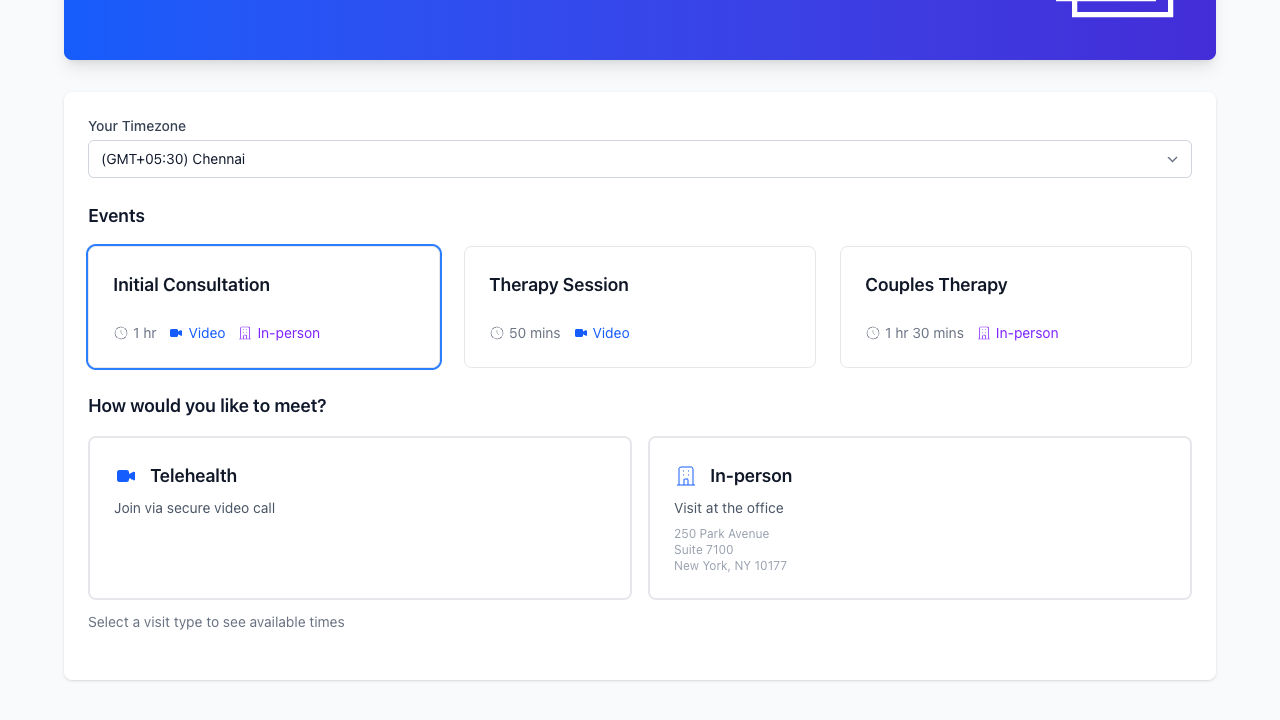
Sessions can be telehealth or in-person. You control which options are available per event type, and clients choose when they book.
Setting the visit type on events
Each event type has a Visit Type dropdown with three options:
- Telehealth & In-person - Clients choose how they want to meet when booking
- Telehealth Only - All bookings for this event are video sessions
- In-person Only - All bookings for this event are at your office
To set it, go to My Profile > Events and pick the option that fits each event type.
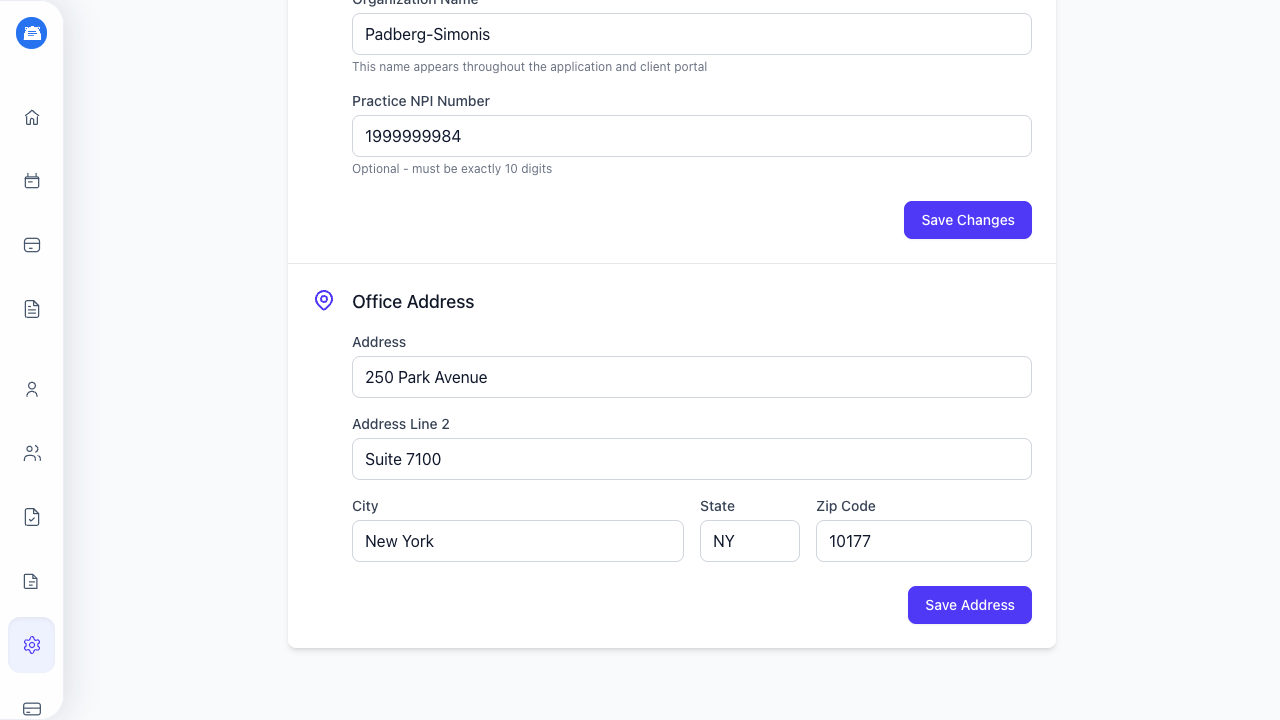
Office address
If any of your events allow in-person visits, you’ll want to add your office address so clients can see where to go. Head to Practice Settings > Office Address and fill in your street address, city, state, and zip code. This address shows up on your booking page when a client selects an in-person visit.
How clients see it
When a client picks an event that allows both visit types, they’ll see two cards: one for telehealth and one for in-person. They choose before selecting a time slot. If the event only allows one type, the booking skips this step entirely.
Switching visit types after booking
Things come up. A client who booked in-person might need to switch to video, or the other way around. You can change the visit type from the session edit page at any time.
Video Meetings
Each session automatically gets a video meeting room. The meeting link appears on:
- The session details page
- Confirmation emails sent to you and the client
Clients can join meetings from their client portal.
Calendar Sync (Outlook)
Connect your Microsoft Outlook calendar to automatically sync sessions:
- Go to My Profile > Connected Accounts
- Click Connect Microsoft Account
- Sign in and authorize access
Once connected:
- New sessions appear on your Outlook calendar
- Updated sessions sync automatically
- Cancelled sessions are removed from your calendar
To disconnect, return to My Profile > Connected Accounts and click Disconnect.
Email Notifications
The system sends automatic emails for:
| Event | You Receive | Client Receives |
|---|---|---|
| New booking | Yes | Yes |
| You cancel | - | Yes (optional) |
| Client cancels | Yes | - |
Frequently Asked Questions
How far in advance can clients book? Clients can book any available slot from the current week onward. Same-day bookings require at least 30 minutes notice.
What if a client books during a time I’m already scheduled? The system prevents double-booking. Clients only see slots where you’re available AND don’t have existing sessions.
Can clients reschedule? Clients can cancel and rebook. Direct rescheduling requires them to cancel the original session first.
How do I block off time for vacation? Go to My Profile > Time Off and add the dates you’ll be away. Those slots will automatically disappear from your booking page. Existing bookings won’t be affected — you’ll need to cancel those individually.
What timezone are sessions displayed in? Sessions display in your account timezone. Clients see times converted to their selected timezone when booking.