Forms
Forms let you collect information from clients digitally. Whether it’s intake paperwork, questionnaires, or consent forms, you can build exactly what you need and send it to clients through the client portal or via a shareable link.
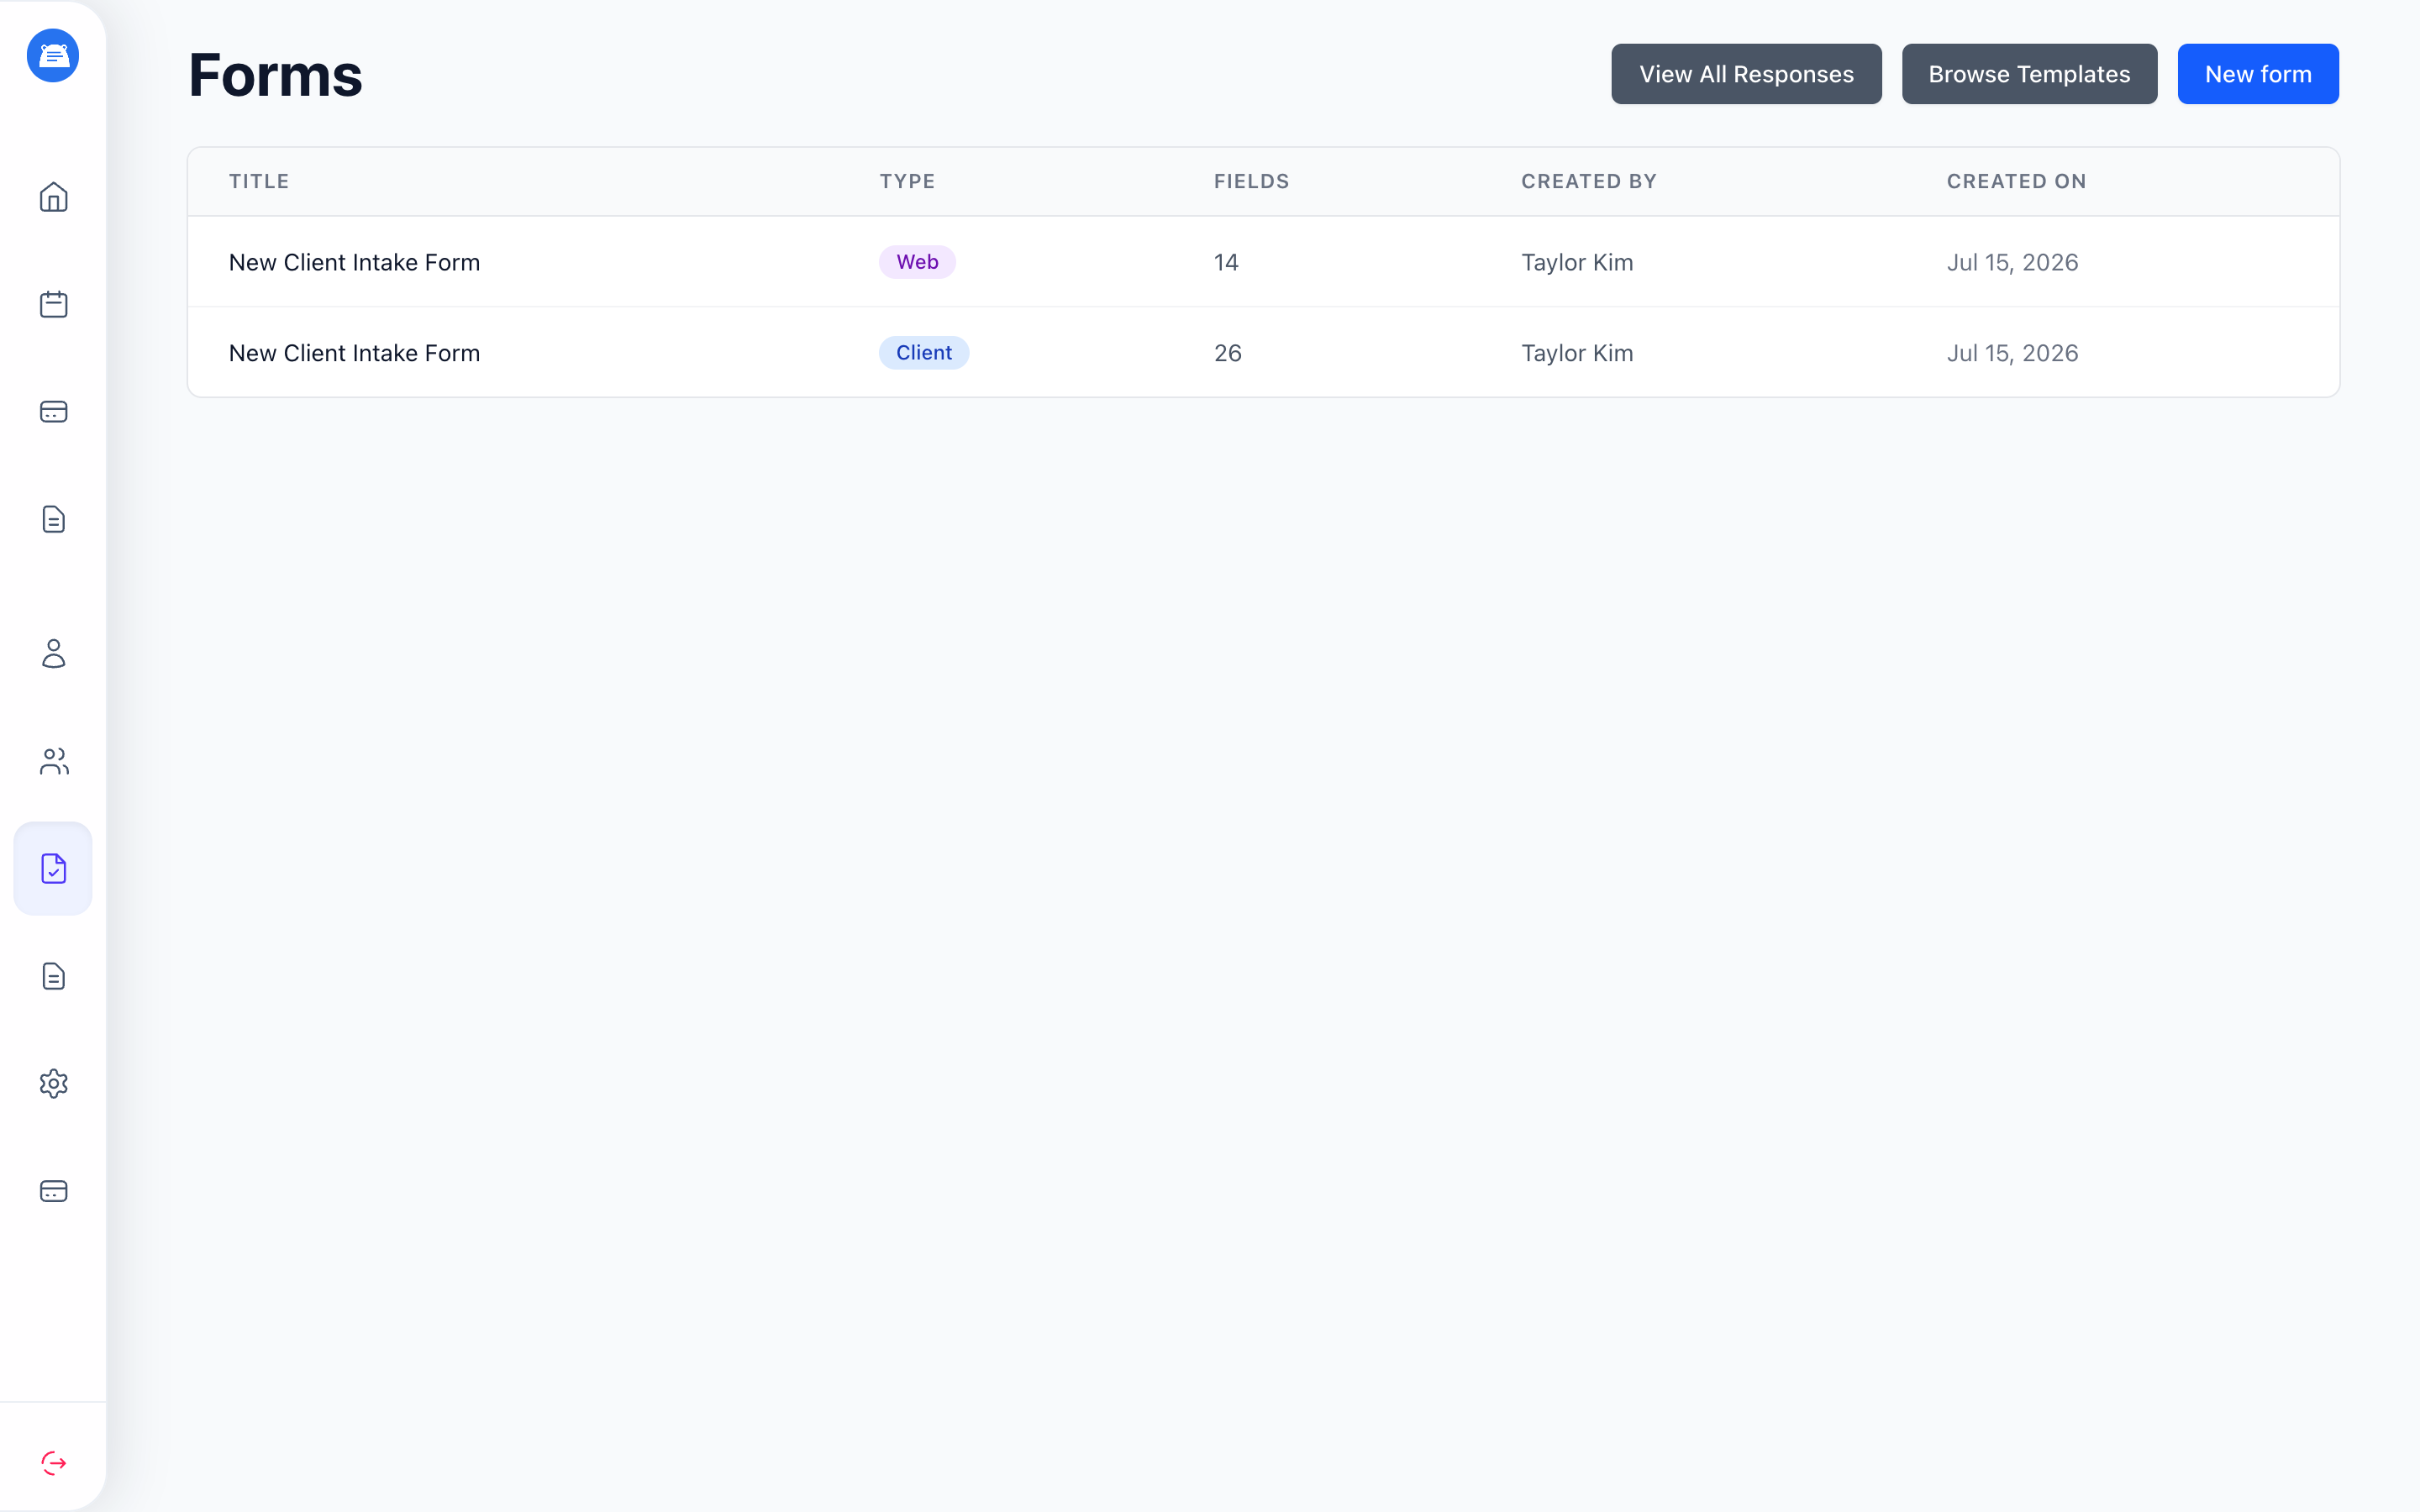
Form Types
Section titled “Form Types”Client Forms
Section titled “Client Forms”Send forms directly to specific clients through the client portal. When you assign a form to a client, it appears in their portal. If the client already has portal access, they also receive an email notification. If they haven’t joined the portal yet, the form will be waiting for them once they do. Once submitted, the response is automatically attached to their record.
Under Sharing, you control who else in your practice can use each form:
- Only me - Only you can use this form and see its responses
- Everyone in the practice - Any staff member can send this form. Even then, you only see the responses from your own clients
Web Forms
Section titled “Web Forms”Create public forms with shareable URLs. Anyone with the link can submit a response without logging in. This is useful for:
- Initial inquiries from your website
- Screening questionnaires before booking
- Collecting information from referral sources
Web form submissions are anonymous until you assign them to a client record.
Creating a Form
Section titled “Creating a Form”- Go to Forms in the main navigation
- Click New form
- Pick a form type, then give your form a title and optional description
- Add fields, sections, or instructions using the form builder
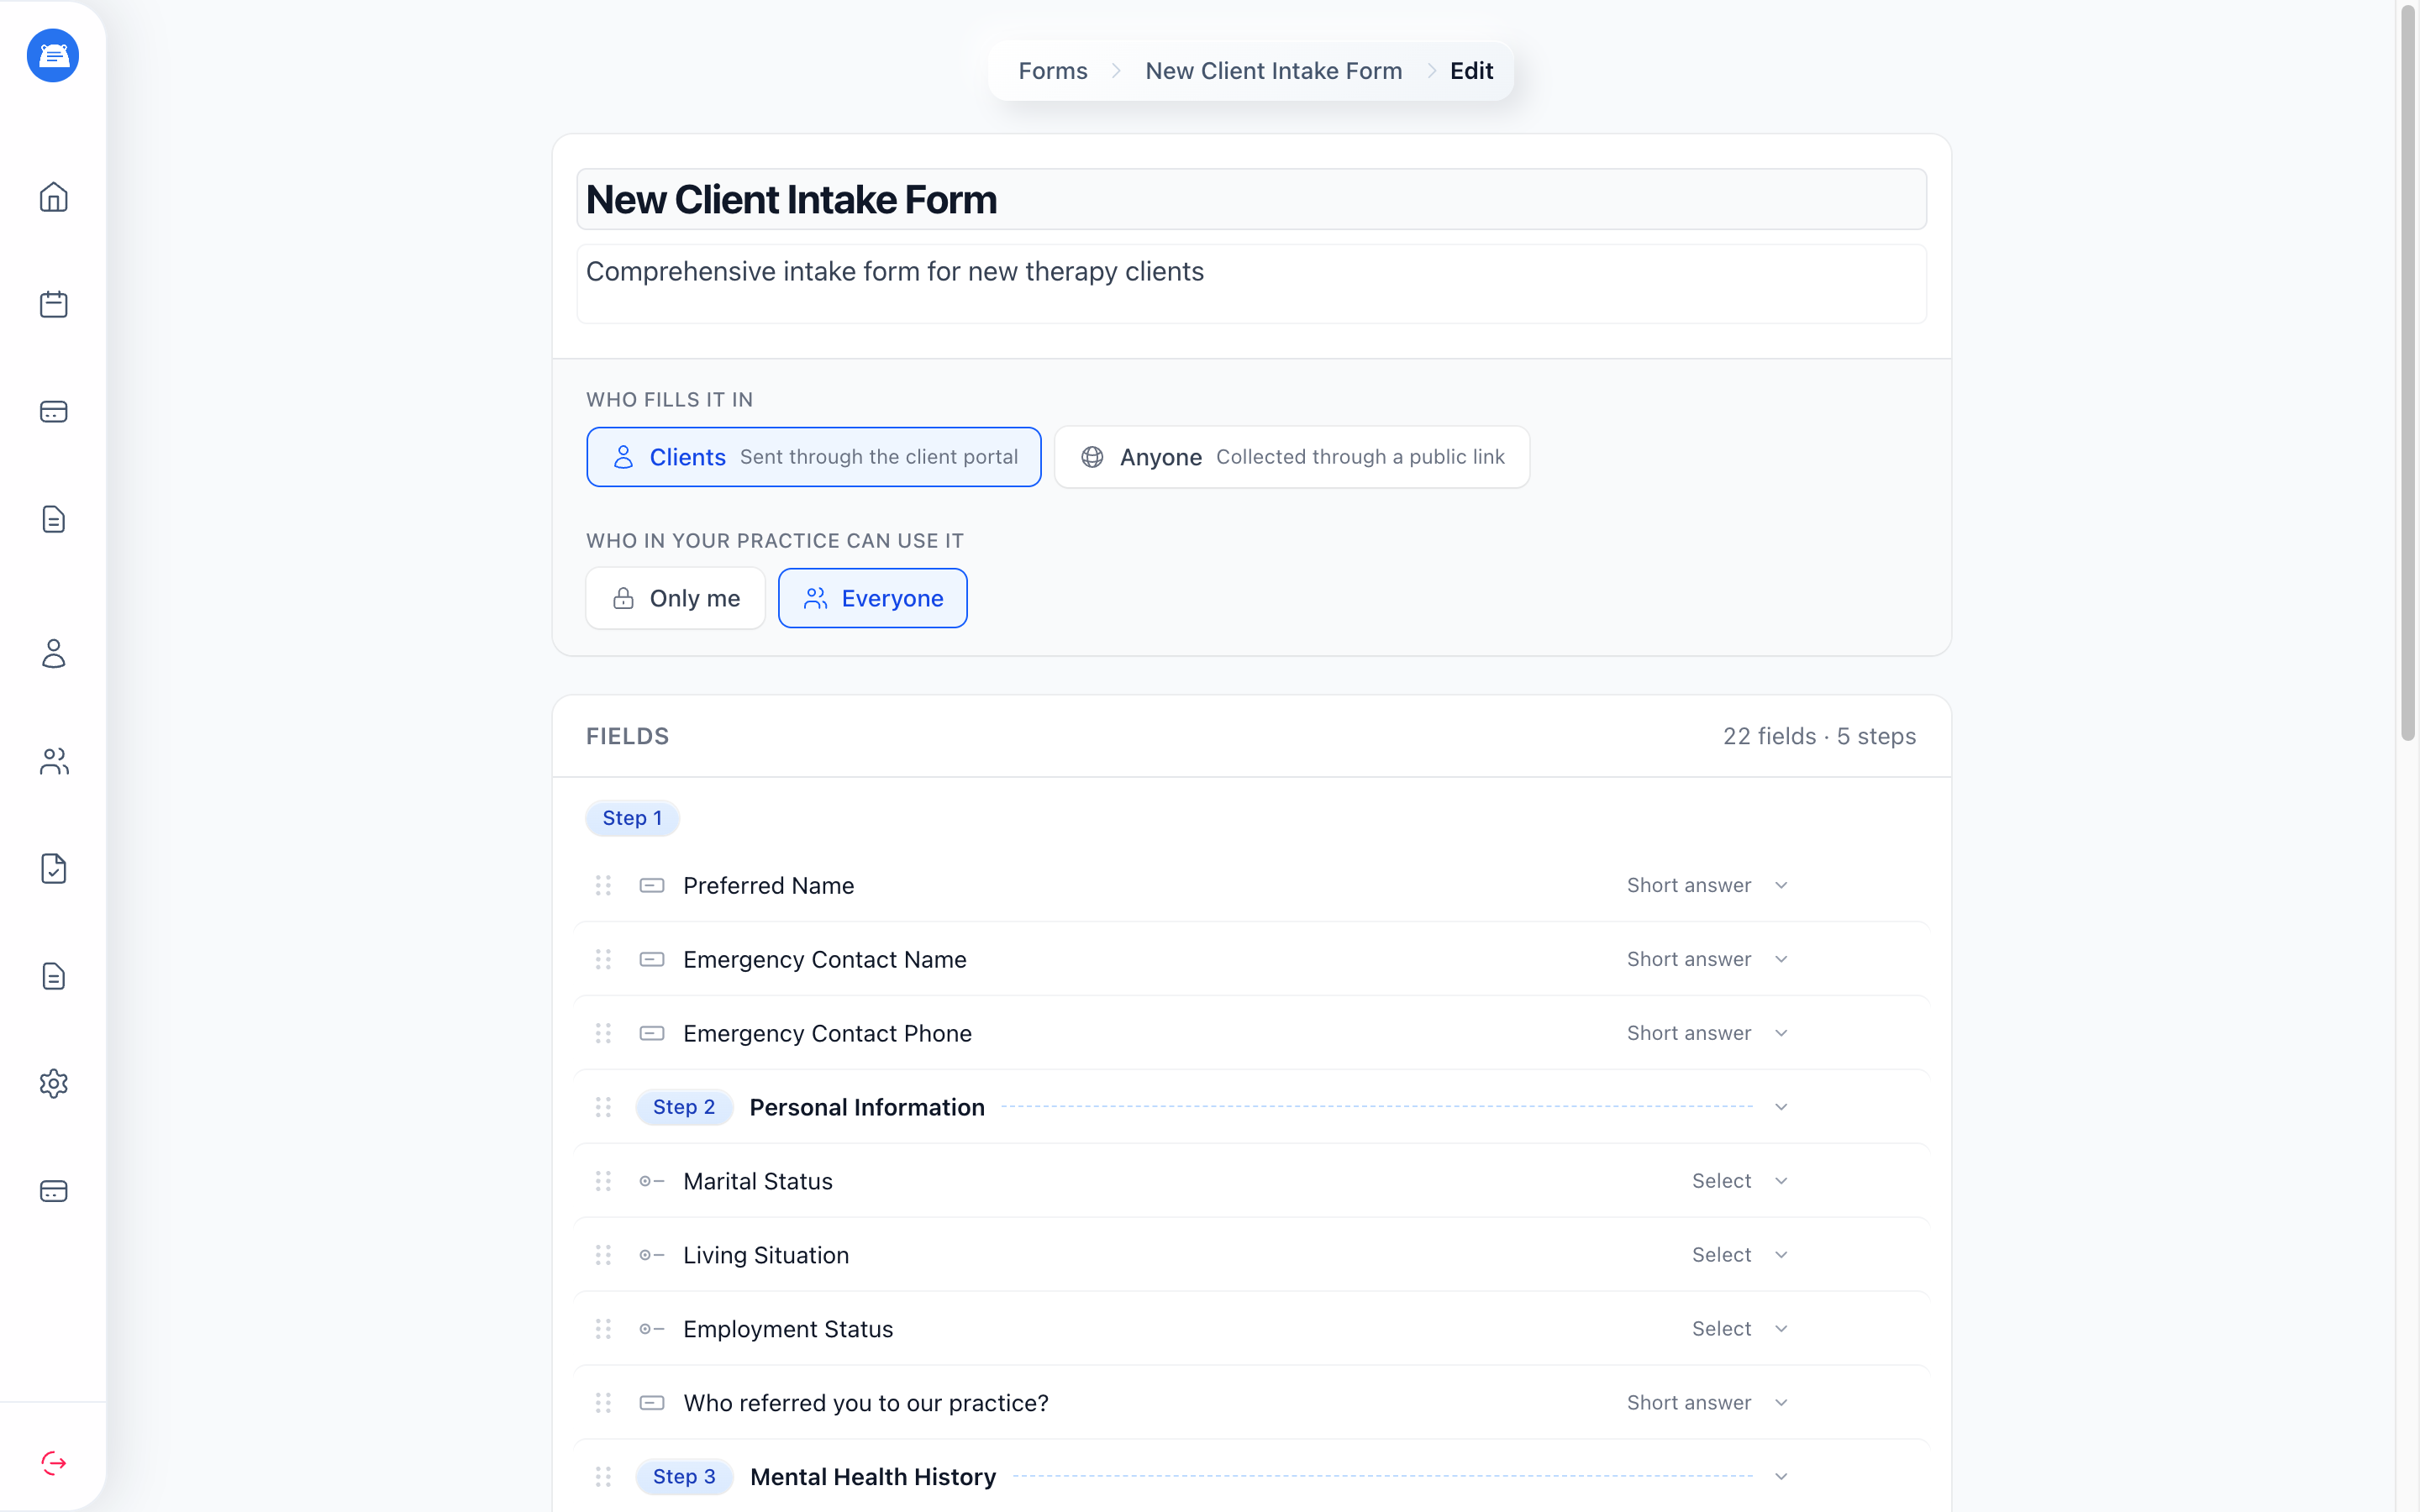
The builder keeps the form in the order clients will see it. Use Field to add a field, Section to start a new step, and Content to add instructions or context without asking for an answer. Drag rows to reorder them, or use the insert control on a row to add something below it.
Starting from a Template
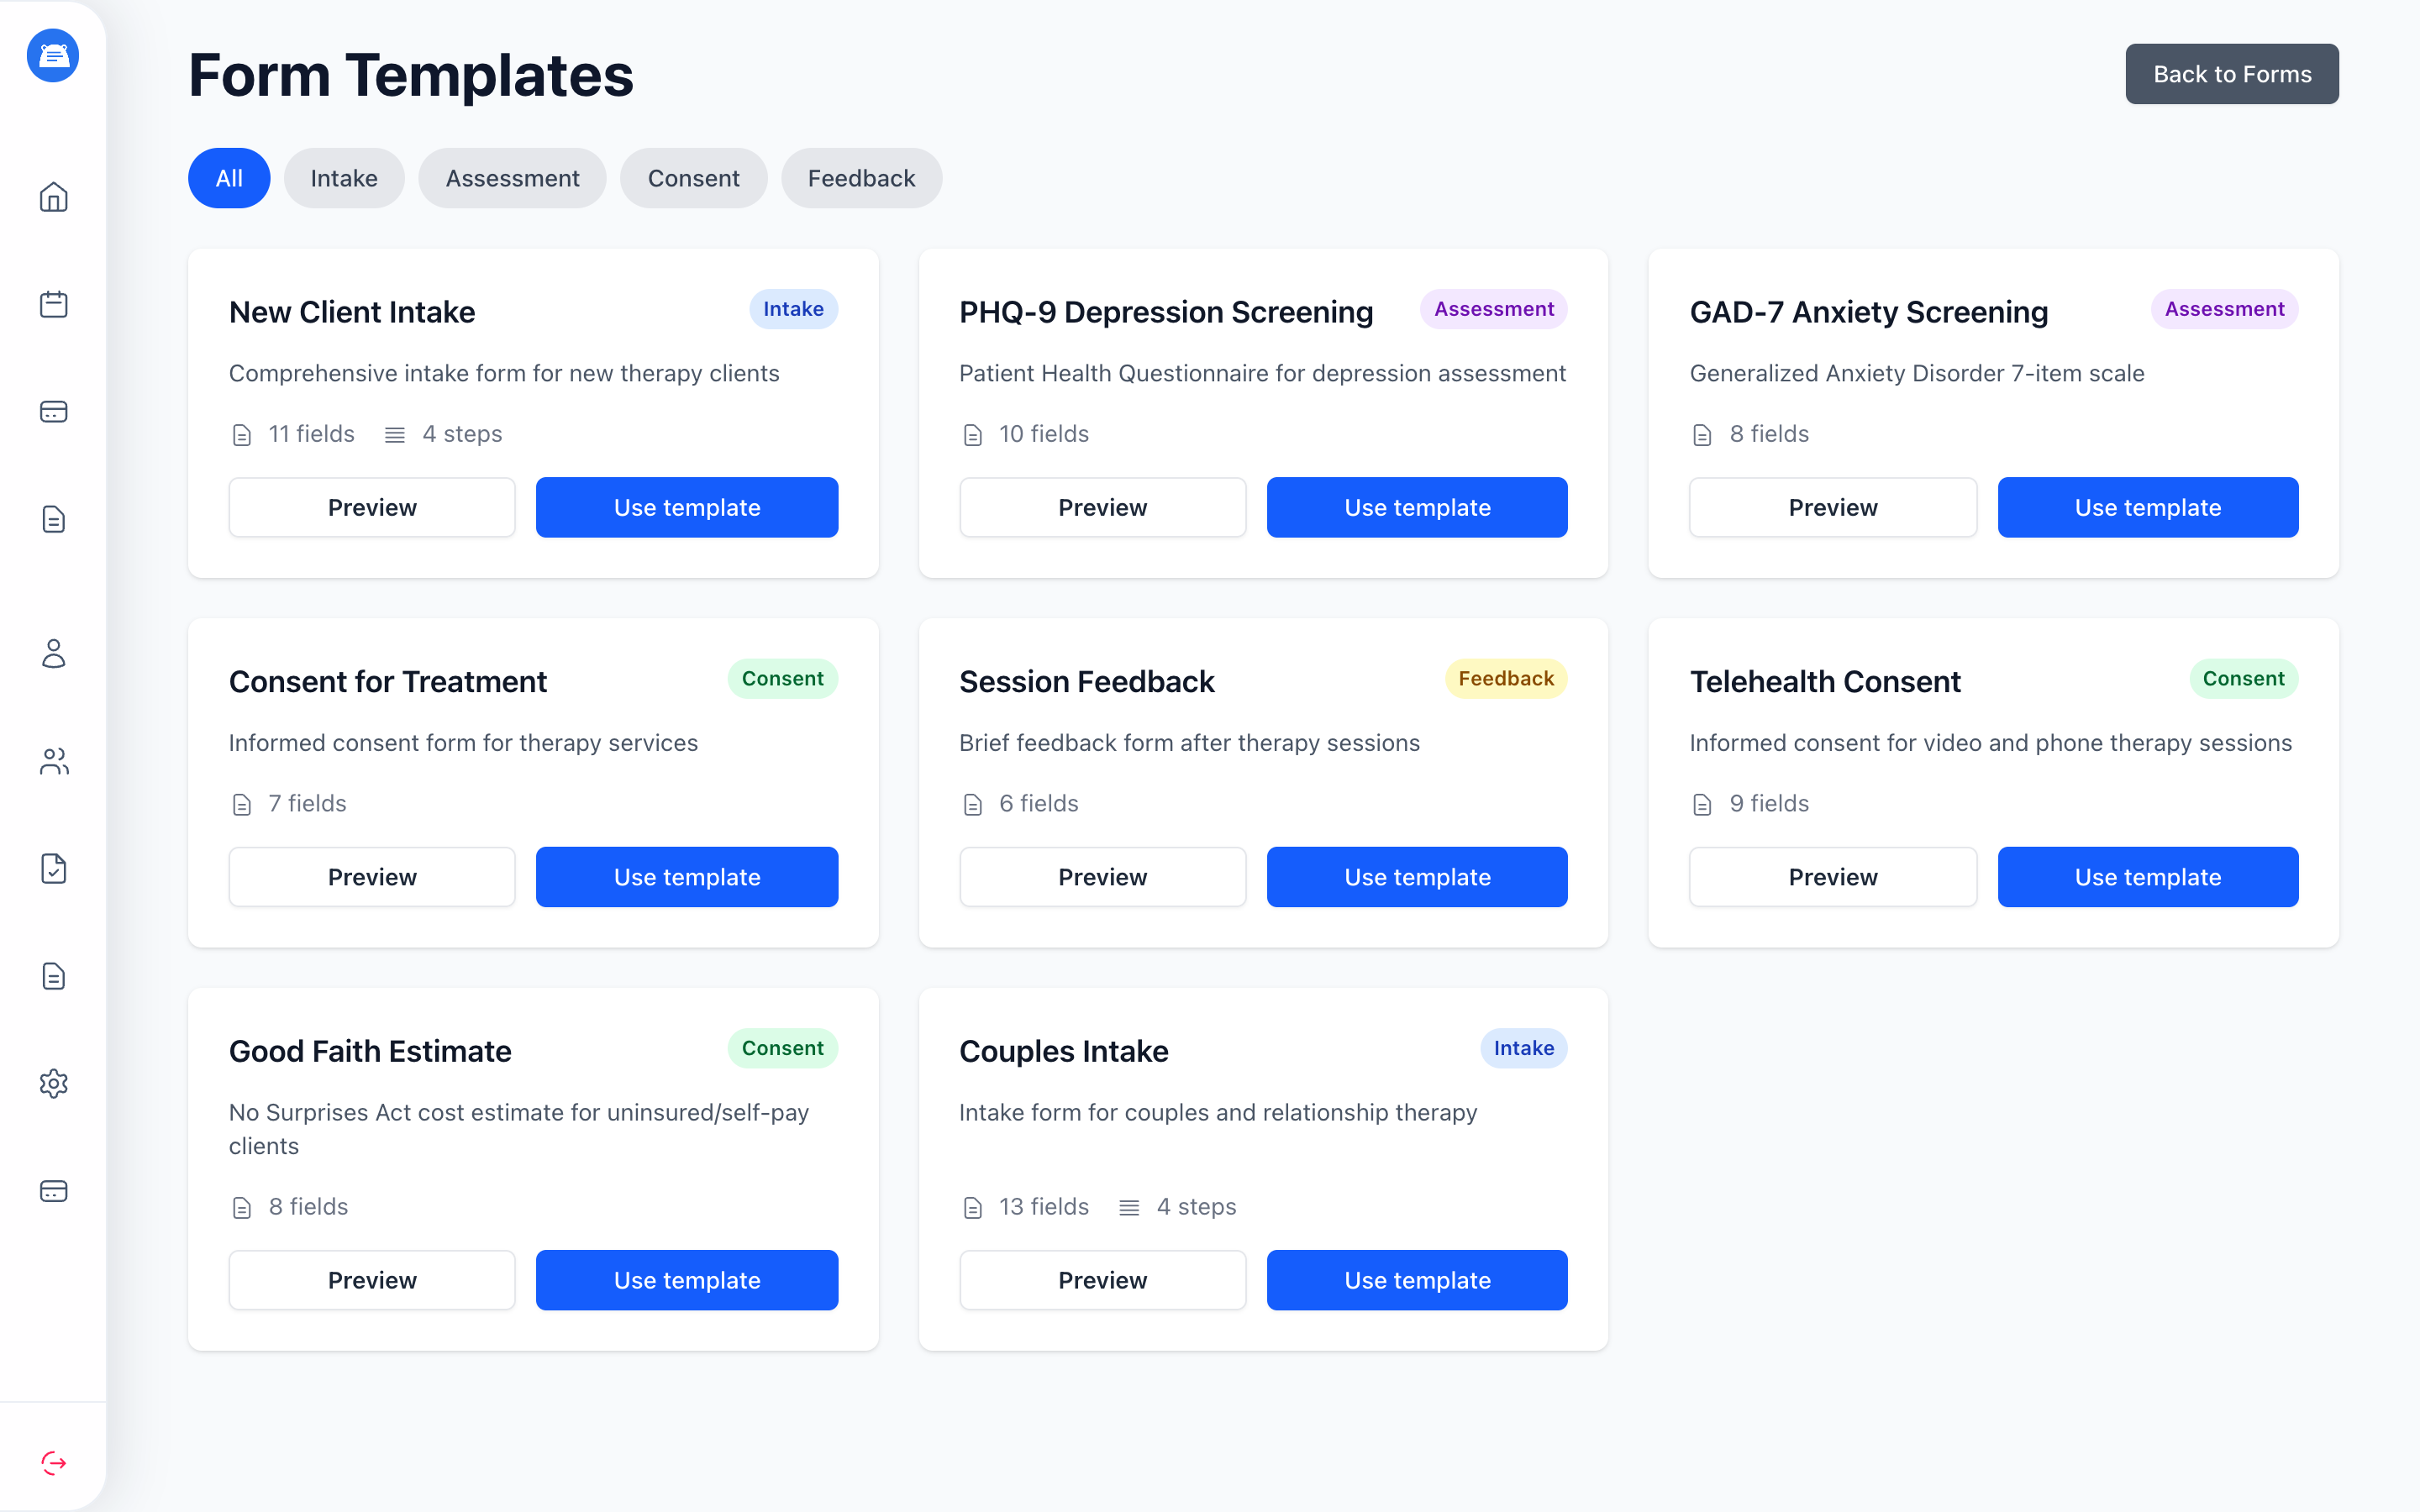
Section titled “Starting from a Template”Don’t want to build from scratch? We include ready-made templates for common therapy forms:
- Intake - New Client Intake, Couples Intake
- Assessment - PHQ-9 Depression Screening, GAD-7 Anxiety Screening
- Consent - Consent for Treatment, Telehealth Consent, Good Faith Estimate
- Feedback - Session Feedback
To use a template:
- Go to Forms and click Browse Templates
- Click Preview on any template to see its fields
- Click Use template to create a new form based on it
- Customize the form as needed
Previewing a Form
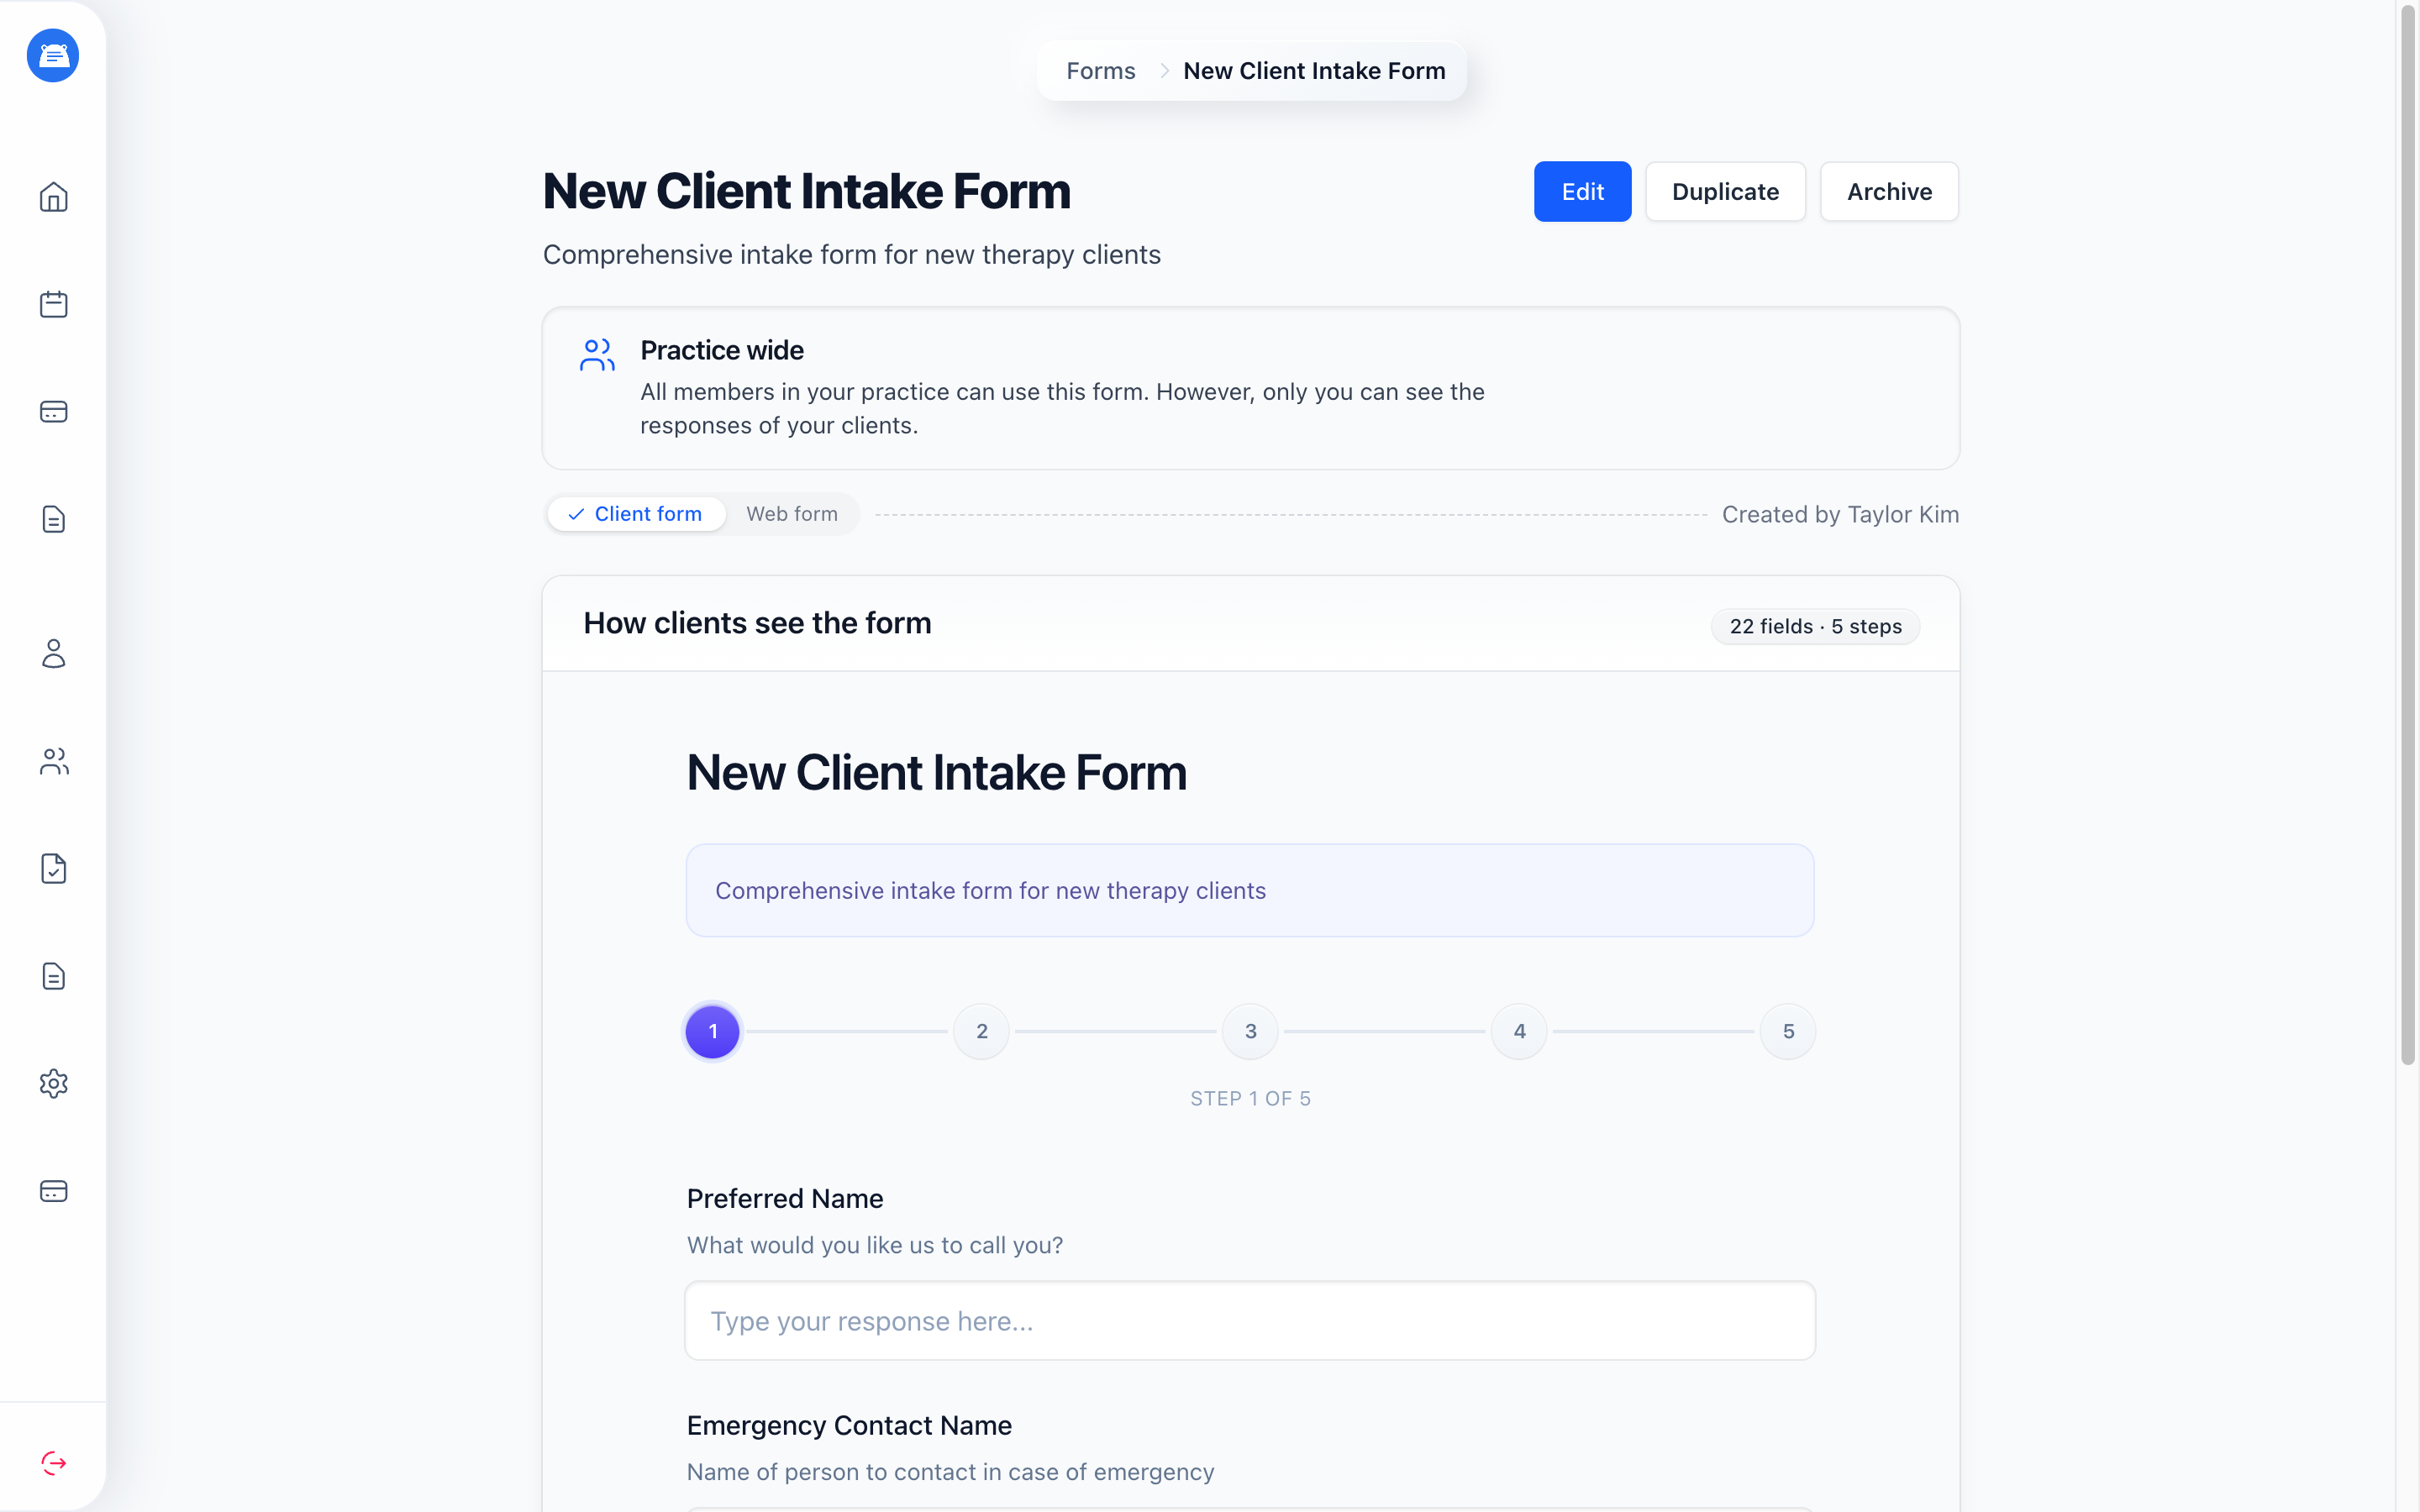
Section titled “Previewing a Form”Open a saved form to see How clients see the form. The preview uses the client layout and shows the title, description, fields, and sections. The buttons are for display only, so you can check the flow without submitting a response.
Field Types
Section titled “Field Types”| Type | Use For |
|---|---|
| Short answer | Names, addresses, and brief responses |
| Paragraph | Longer answers that need more space |
| Select | One choice from a dropdown |
| Multiselect | Multiple choices |
| Acknowledgment | A statement the client checks to accept |
| Date | Birth dates and appointment preferences |
| Signature | Consent acknowledgments and agreements |
| Content | Instructions or context with no response |
| Section | Dividing long forms into steps |
Multi-Step Forms
Section titled “Multi-Step Forms”For longer forms, add Section fields to break the form into steps. Each section marks the start of a new step, making the form less overwhelming for clients.
Clients can move back and forth between steps, save their progress, and pick up where they left off.
Add Content blocks before or between fields when clients need instructions or context. A section with no fields under it becomes a read-only step. Use it for anything the client needs to read before continuing, such as a welcome message.
Sending Forms to Clients
Section titled “Sending Forms to Clients”From a Client’s Profile
Section titled “From a Client’s Profile”- Open the client’s profile
- Click Send form
- Select the form you want to send
- The client will see it in their portal. If they already have portal access, they’ll also receive an email notification
From a Session
Section titled “From a Session”- Open the session’s details page
- Click Send form
- Select the form you want to send
The form goes to everyone attending the session. For a couples, family, or group session, each attendee gets their own private copy - their answers stay in their own record and are never shared with the other attendees.
Via Public Link (Web Forms)
Section titled “Via Public Link (Web Forms)”- Open the form you want to share
- Click Generate Shareable Link to create a public URL
- Click Copy to copy the link to your clipboard
- Share this link on your website, in emails, or wherever you need it
Reviewing Responses
Section titled “Reviewing Responses”Click the bell on a form’s page to receive email notifications for new responses.
When a client submits a form, you’ll see it in:
- The client’s profile under the Forms section for forms sent to that client
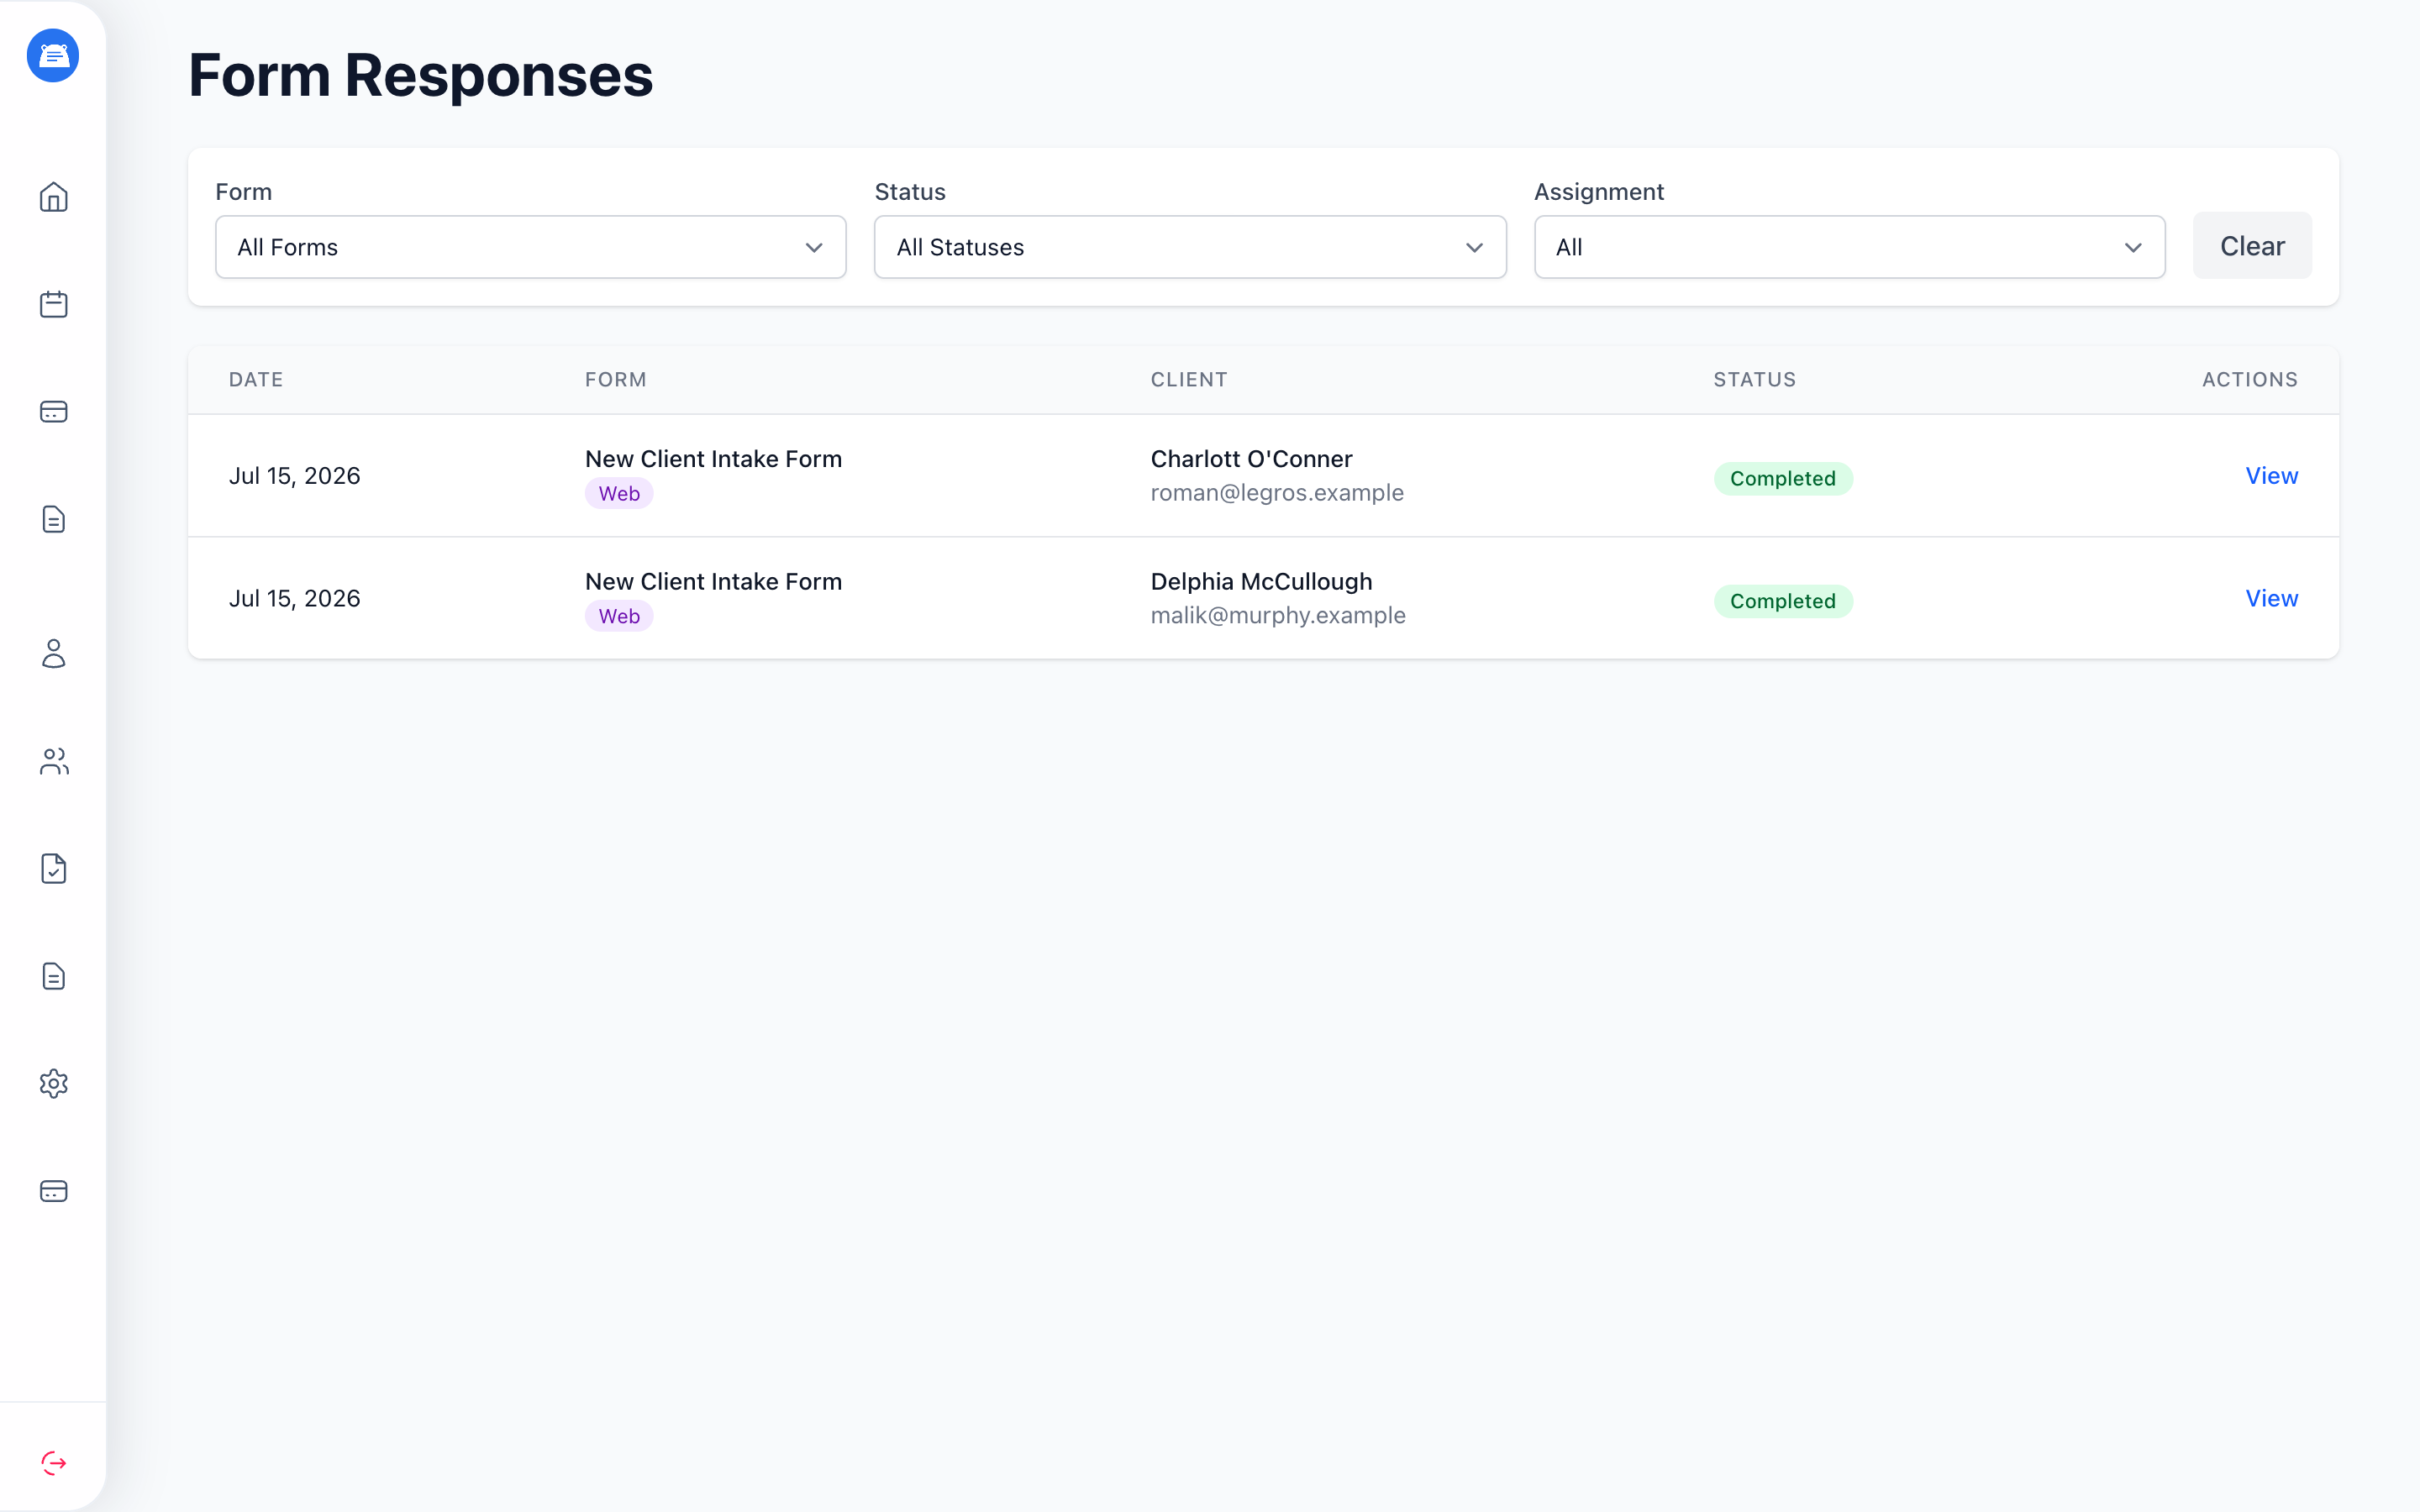
- The View All Responses page (accessible from the Forms index)
Web form submissions created from a public link appear in View All Responses first. They remain unassigned until you attach them to a client record.
Click View on any response to see the submitted answers. You can filter the list by form, status, or assignment.
Removing Sent Forms
Section titled “Removing Sent Forms”You can remove a sent form whether or not the client has completed it. From the client’s profile, click the trash icon, or open the sent form and click Delete; any answers the client submitted are deleted too.
Archiving Forms
Section titled “Archiving Forms”Archive forms you no longer send. They disappear from send menus and their public links stop working for web forms, but their responses remain available.
If you need to change a form that already has responses, duplicate it, edit the copy, then archive the old version. Archived forms appear at the bottom of the Forms page, where you can Unarchive them.
Tips and Gotchas
Section titled “Tips and Gotchas”Forms Lock After First Response
Section titled “Forms Lock After First Response”Once a form has at least one response, you cannot edit its fields. This protects data integrity - changing fields after someone has answered them would make the responses inconsistent.
You can still rename the form or update its description and visibility at any time.
What to do instead: Duplicate the form, edit the copy, then archive the old version.
Duplicating Forms
Section titled “Duplicating Forms”Need to tweak an existing form? Rather than starting from scratch:
- Go to the form you want to copy
- Click Duplicate
- Make your changes to the copy
- Save the new form
This is especially useful when you need variations of the same form or when you want to update a form that already has responses.